Hello!
We continue to learn about self-repair at home, without going to the service.
Today we will talk about the basics of soldering work.
Workplace
Provide good ventilation and lighting when performing soldering work. Also, make your workplace comfortable in height. It is much more convenient for me when the table on which I perform soldering work is slightly lower than a regular writing table. Thus, the shoulders are less tired. I highly recommend getting a base for the table on which you will be soldering. This will protect the table surface from being damaged by the soldering iron. In my opinion, a thick silicone mat is an excellent option. It is not afraid of high temperatures, and at the same time parts do not slip on it. You can buy it in any household supermarket.
Safety engineering
Equip your workstation with a secure soldering iron holder that you won't be able to accidentally brush away or pull off by the wire. Remove all flammable materials from the soldering iron. It is great if the soldering iron lying in its place is protected from the possibility of touching it (pets love to smell or touch them very much, and believe me it will not be very pleasant to rush around the house after a screaming cat or dog whose nose or paw is swollen from getting to know the surface such an interesting subject). The same is true for young children.
Tools and materials
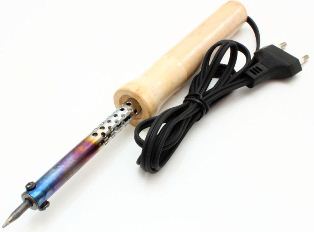
What do we need for soldering? For starters, of course, a soldering iron with replaceable tips (ideally a soldering station). As I already wrote in the previous article, to start your repair activities, it is best to use a low-power soldering iron (25W), so you will minimize the risk of overheating, and therefore damage the elements on the board.
The main consumables you will need for soldering are solder and flux.
Solder
Solder is a material used to connect various elements by soldering.
As a solder, in electronics repair, tin alloy with various materials is most often used.
There are solders with different melting points. If you do not plan to solder aluminum pans, the most popular type of solder – POS-61, which consists of 61% tin and 39% lead, will suit you. Its melting point is 190 C.
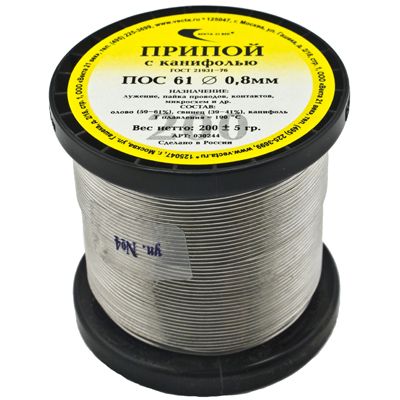
POS-61, this is my main type of solder. It comes in various forms, ranging from thick rods, ingots, and ending with thin, hollow tubes, the insides of which are filled with flux (rosin). Thus, we get a convenient '2 in 1' material, the use of which greatly simplifies our life. Thanks to this design, there is no need to break away from the soldering process and lower the soldering iron tip into rosin.
But, it is not always possible to use POS-61. In the process of repairing electronics, it is often necessary to solder elements that are sensitive to overheating, which must be soldered at low temperatures. In this case, I use Rose alloy (POSV-50) as a solder. It consists of three elements, tin 25%, lead 25%, bismuth 50%.
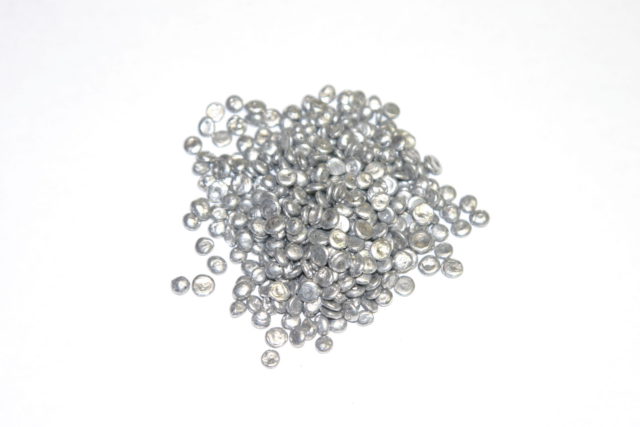
A feature of this alloy is a very low melting point, only 94C (below the boiling point of water). In this case, you do not have to worry about the possible overheating of the circuit. However, it is important to understand that you should not solder the elements with the Rose alloy, which are exposed to high temperatures during operation.
In addition to POS-61 and POSV-50, there is a fairly large number of solders for various soldering conditions, but I am only talking about my own experience and home use, so I will limit myself to these two types that I use.
Fluxes
Flux is an active substance with the help of which the soldered surfaces are cleaned of oxides, and better spreading of the solder and its contact with the surface is ensured.
Here, the beginner master is waiting for expanse, and at the same time the torment of choice.
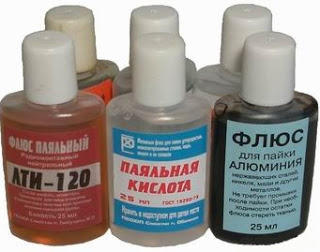
All fluxes can be divided into two broad categories: 1 – aggressive, 2 – non-aggressive. Aggressive ones are usually made on the basis of various acids that actively act on the surface, therefore, after application, they must be washed off with Flux-off. Non-aggressive, as a rule, have a familiar rosin.
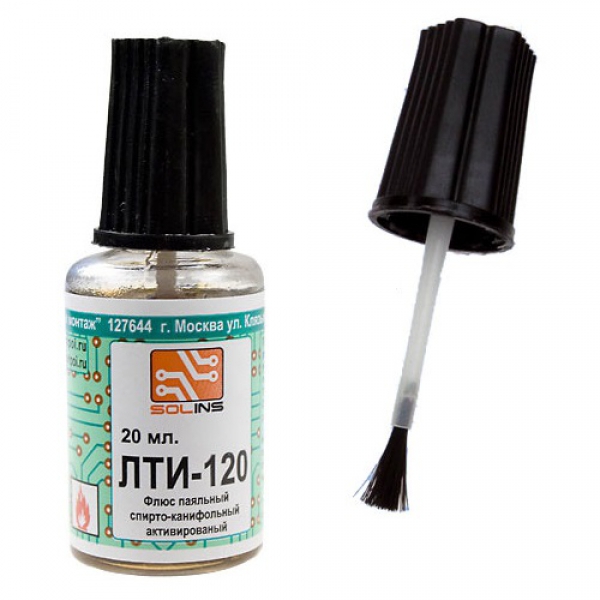
The easiest way is to buy flux at any radio parts store. I use LTI-120 most often.
But at home, you can make both types of flux yourself. The first and easiest way is to pour crushed rosin in a 50/50 proportion with alcohol and shake. As the alcohol evaporates, the flux will thicken. Just add alcohol to get the consistency you want again. Important: add alcohol to rosin, to the desired consistency, and not to the master, to condition. ?
In addition, if, for some reason, you need an aggressive flux, you can fill in regular aspirin with alcohol, which will perfectly cope with this role. Just be prepared for a bad smell when soldering.
Among other things, I strongly recommend getting small nippers, a file (file) and a few tweezers. You will need a file for stripping a soldering iron, nippers for biting off extra legs from parts or stripping insulation from wires, and tweezers to hold parts while soldering.
Start
Soldering iron tips are of two main types.
- Copper (or copper alloy).
- Nickel-plated, it is also called eternal or non-combustible.
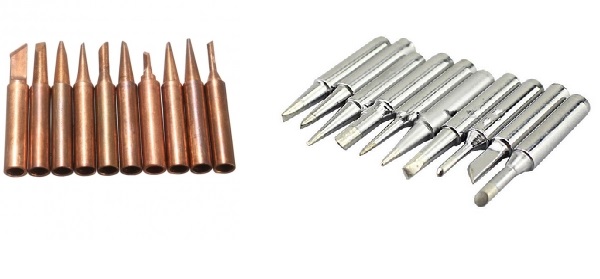
At the training stage, I would still recommend a copper tip – it is easier for them to solder. Nickel plated requires special care and does not like mechanical influences. It cannot be filed, scratched, skinned. It is recommended to clean only with a wet cloth. And also, in order to solder them, it is necessary not only not to let it heat up above 300 degrees, but to observe the whole technology for which the word ritual is more suitable, otherwise the solder will simply not stick to the sting.
There are no such problems with a copper sting, but unlike nickel-plated, it tends to burn out, since during the soldering process, copper gradually dissolves in the solder. Therefore, the copper sting must be periodically tweaked and descaled.
Before starting work, a new soldering iron with a copper sting must be put on alert – warm up and tinned.
When you turn it on for the first time, you may smell a burning smell. Don't be alarmed, this is normal. Excess grease burns out in the soldering iron. It will pass quickly.
The first heating can be carried out within 10-15 minutes. After warming up, with a file (small file), we clean the sting and immediately after that, until it has oxidized, we dip it in rosin, and then immediately in the solder. If you have rosin-filled tubular solder, you can melt some of this solder on a soldering iron. Our task is to achieve a result in which the main working surface of the tip will be evenly covered with solder.
After we have prepared the soldering iron, it is necessary to prepare the elements that we will be soldering. To do this, they need to be tinned. We tinker them in the same way as we prepared a soldering iron tip.
I recommend that you start learning to solder not from the phones that you are going to repair, but from large parts, for example, unnecessary wires.
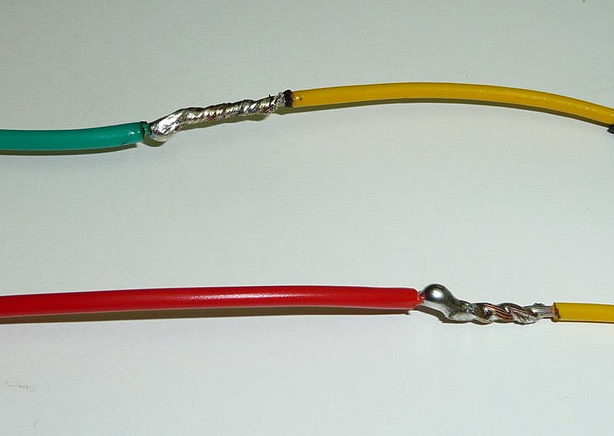
After the soldering iron and the parts are prepared, our task is to solder them to each other. To do this, it is necessary to bring the soldered ones to each other, apply the required amount of flux (no frills) with a brush, press the parts together, and then take a little solder on the tip (just enough to be enough for soldering and at the same time there are no so-called ' snot '), solder. It is desirable to get it right the first time. You do not need to heat the connection for too long (remember the part overheating). As a result, you should get an even, neat, connection, with a thin layer of solder. A quality solder spot should shine. If the solder is dull, it is most likely not hot enough.
The principle of soldering with a soldering iron is the same for different parts.
Later, when you master the confident soldering of large parts with one touch, you can try your hand at small parts of phones (legs of system connectors, etc.). I strongly recommend not to start mastering the basics of soldering with small parts. Most likely it will not work, and you will have to give it to the master for restoration.
At one time, I really liked several videos on this topic. I was impressed by the quality of the picture and the angles. I advise you to look:
- https://youtu.be/b15MMzb_GWw
- https://youtu.be/5uiroWBkdFY
There are more than one similar video on this channel.
Reverse process
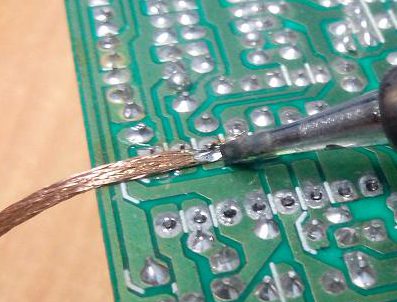
Often, before soldering a new part, it is necessary to desolder the previous one. Sometimes it is not enough just to warm up the part. You may need to remove old solder. For this, there are special devices – suction. But given their cost, at home it is easier to get by with the old proven method – copper braid. Special rolls of such braid are sold at any electrical store, along with solders and fluxes.
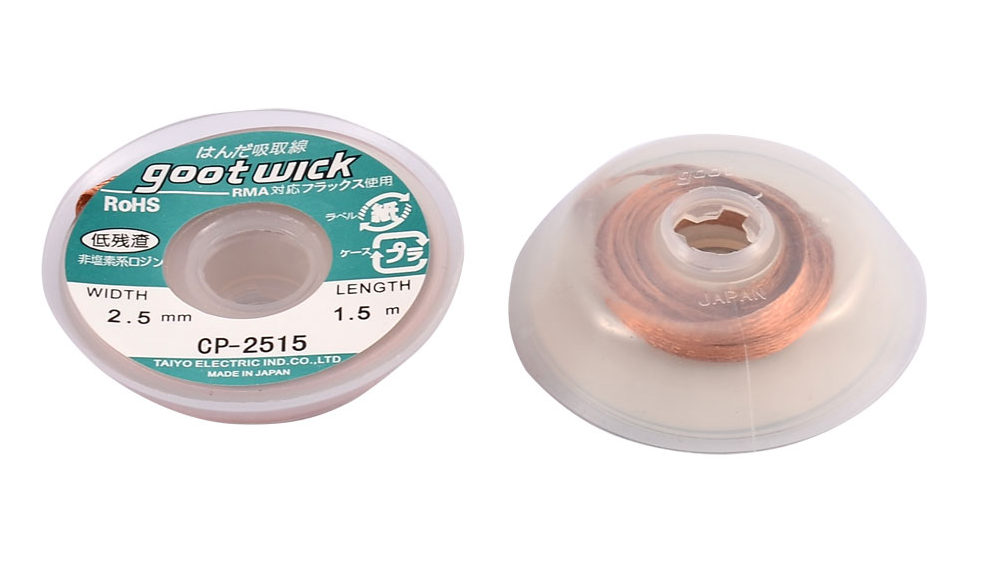
In order to remove the old solder, it is necessary to attach the braid to the desired place, drip (lubricate) with flux, and then press the soldering iron against it. The molten solder will soak into the braid and release the part.
Conclusion
In words, this process is not difficult, and it seems simple. But in reality, it is not always possible to achieve the desired result.
As the saying goes, men are boys who survived by chance. J And although soldering is not as dangerous as melting battery lead plates over a fire and making bombs from magnesium and potassium permanganate, most likely if you decide to try yourself in soldering, you will encounter burnt fingers, and watery eyes, and an unpleasant smell.
Whether it is worth it or not, you decide, but for me, the feeling when a thing you have done works again is akin to a small miracle, which everyone is capable of, with the proper desire and diligence.