It's no secret that the game Death Stranding will soon be released, which has already become a kind of cult for fans of Hideo Kojima's work.
Kojima is a Japanese game designer, screenwriter and video game developer and head of Kojima Productions. But Hideo is best known as the creator of the Metal Gear series. And this year, popularity broke all records, of course, in no small part thanks to the announced game Death Stranding.
This is the first game by Hideo Kojima since his departure from Konami. Actors Norman Reedus, Mads Mikkelsen, Lea Seydoux, Lindsay Wagner and Troy Baker also contributed to the game.
In anticipation of the release of this project, I decided to create fan art, depicting the main character Sam Porter Bridges, and describe the process of work.
Process
The art process starts with a simple one: open Adobe Photoshop and create a new file. I took a small FullHD resolution as a basis.
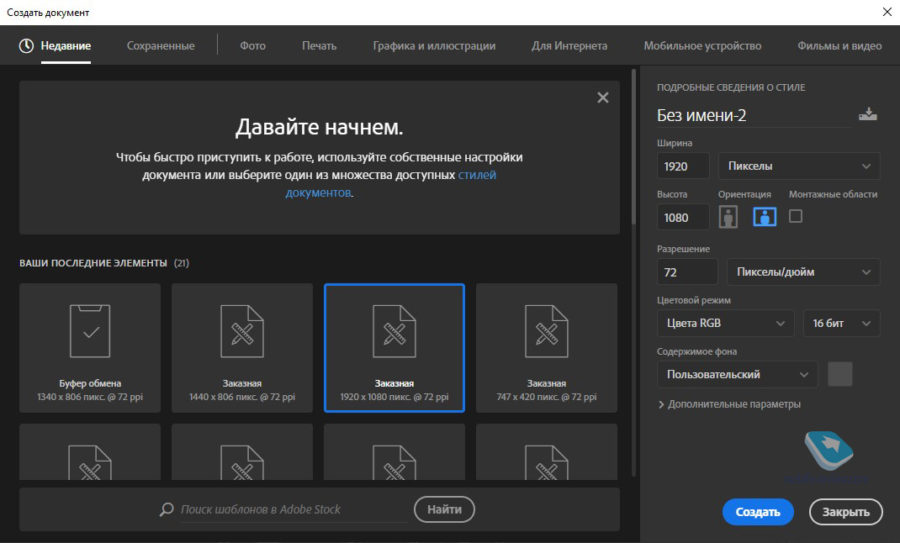
You could also take a higher resolution with a 16: 9 aspect ratio. But because of this, the size of the picture will increase, and, most importantly, in the process of working with a weak hardware, the program may start to slow down due to long image processing. The most common problems with lag appear when using dynamic opacity and brush width, depending on the pressure of the pen on the tablet.
The first step is to highlight the creation of line art (“outline drawing”).
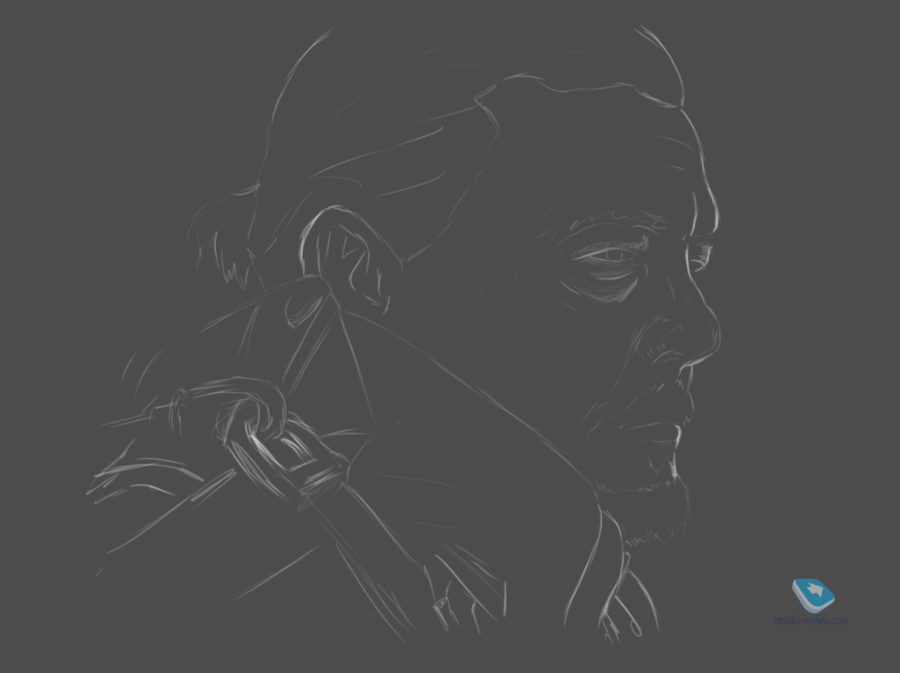
For beginner artists, I can advise you to use references to understand the shape of a face / object, or, if things are really bad, to sketch from a reference. But I do not recommend to trace along the contour, since the accumulation of experience will be reduced to zero.
The second stage is painting. Choosing colors by eye is quite difficult, so I used one of the frames from the trailer. The shot was taken directly from YouTube using LightShot screenshot software. Copy the image selected by the program to the clipboard. In Photoshop, create a new document, select the ready-made “Clipboard” resolution settings

After that, drag the tab inside the first window.
Painting process.
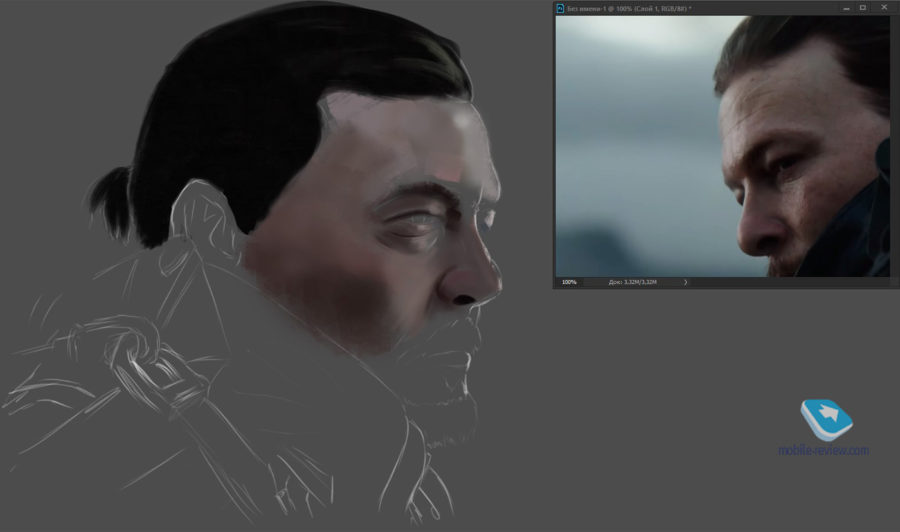
At the moment, “primary” painting is being performed. The main character's hair was placed on a separate layer above the skin. This was done to increase the convenience of working on the skin or hair separately from each other. The clothes will also be placed on a separate top layer.
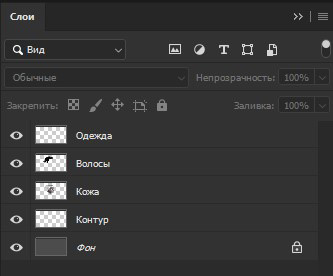
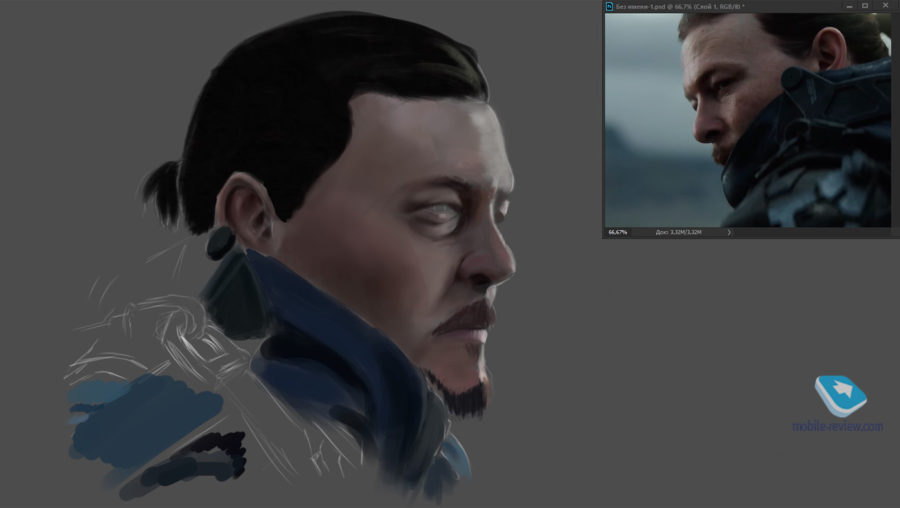
Most of the rest of the clothes I painted randomly on the hair layer.
Completion of primary painting
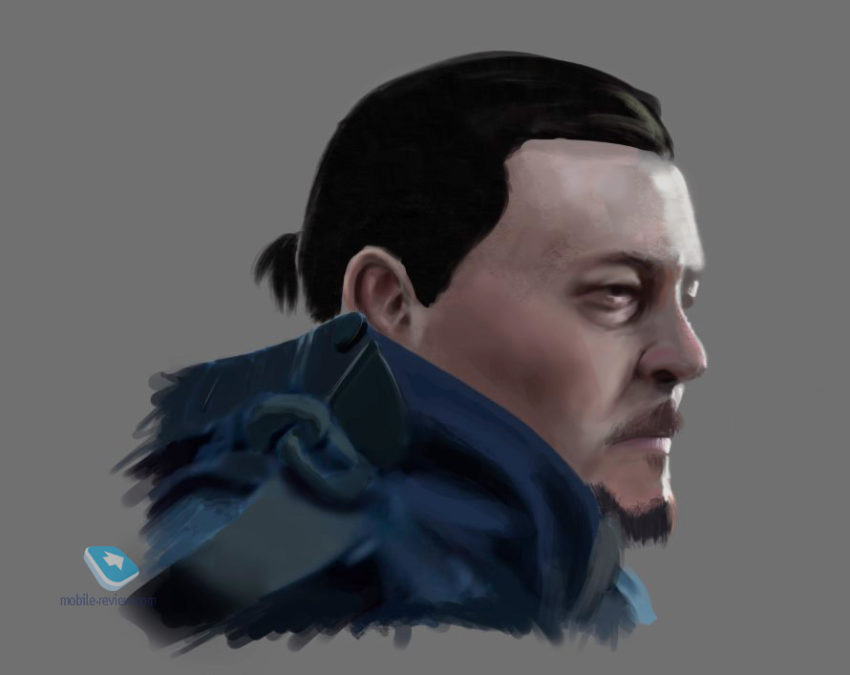
The next stage can be called “detailing”. At this stage, small details will be finalized, for example, removing empty spaces between colors, adding wrinkles, natural skin imperfections, and so on. This stage takes up most of the time in the entire work.
The protagonist's hair, face, and clothing have been separated into layers. I very often use separation of layers for convenience in their subsequent refinement.
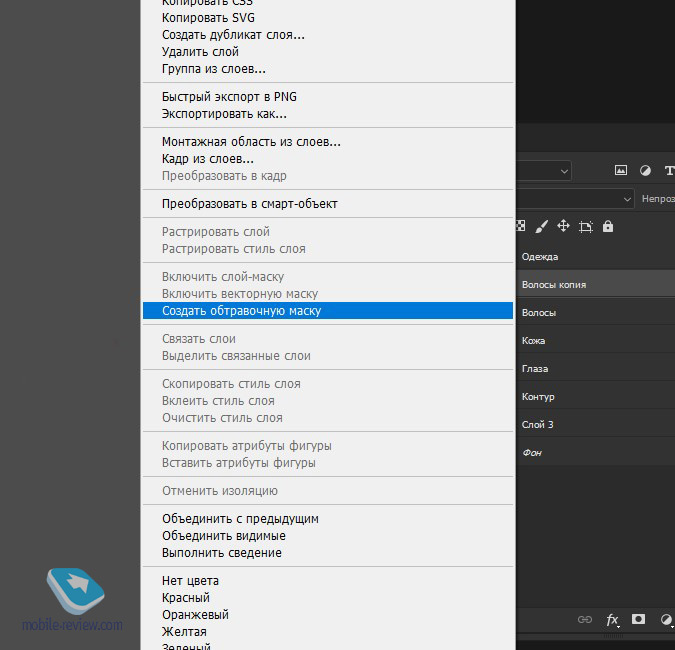
Copy the layer that we want to process / modify, after that we make a clipping mask from the copy.
It is done in order not to go beyond the main layer. Again, I highly recommend using new layers for different parts to avoid problems with reworking any areas where you might have made mistakes.
Create a clipping mask for the hair layer
The colors for detailing can also be taken from the trailer frames.
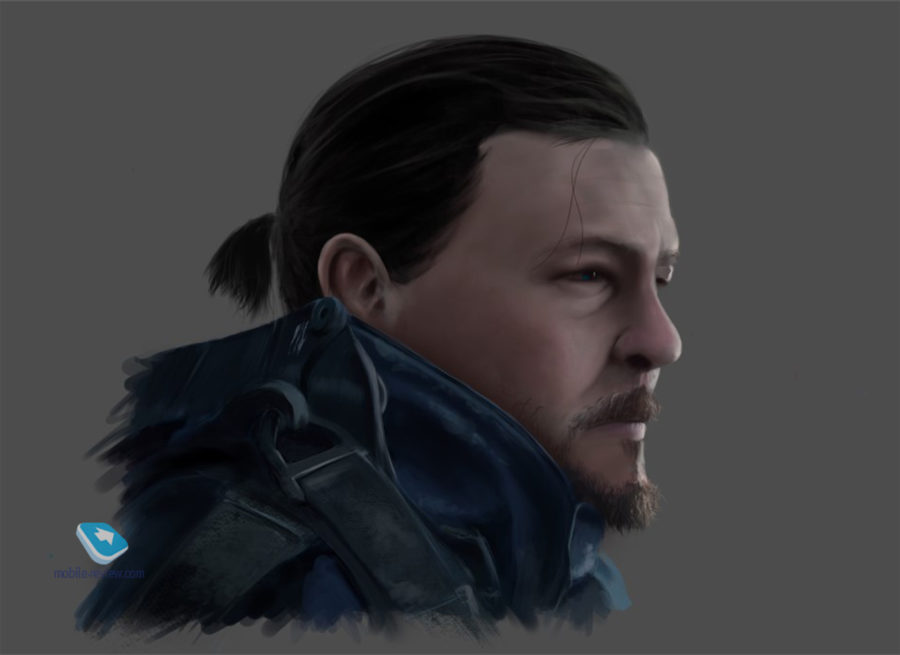
The next steps are final: adding a background, styling and decoration. Well, where can we go without color correction?
The background began to create based on the footage shown in the trailers: fields, mountains and cloudy weather.
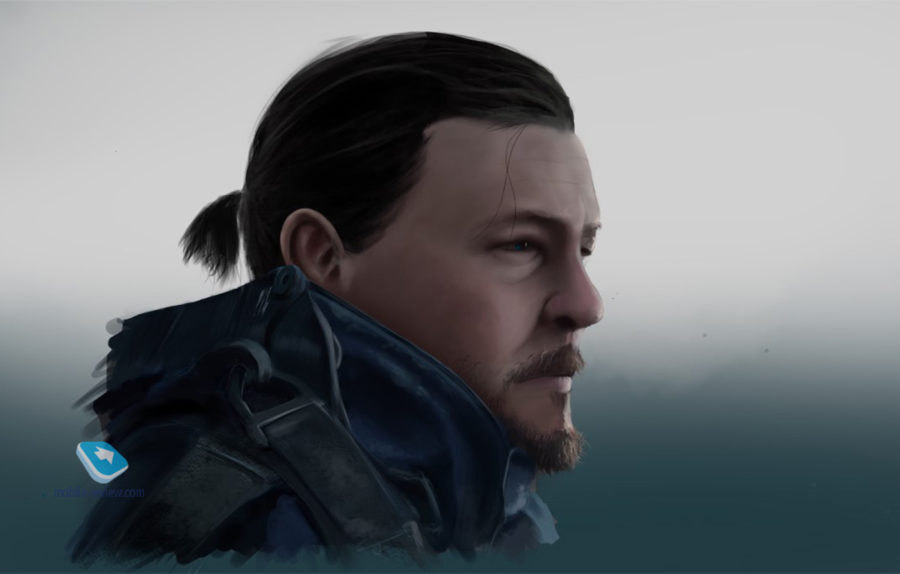
The mountains were made in two different layers. So you can easily paint over different groups with colors of different saturations.
To depict the sky, I used brushes with presets: “Shape Dynamics” and “Scattering”. They are just designed to depict various clouds, as well as, if used correctly, smoke and fog. These brushes can be downloaded from various resources on the Internet. Some artists put out their own brush sets with different settings and textures for free / paid download.
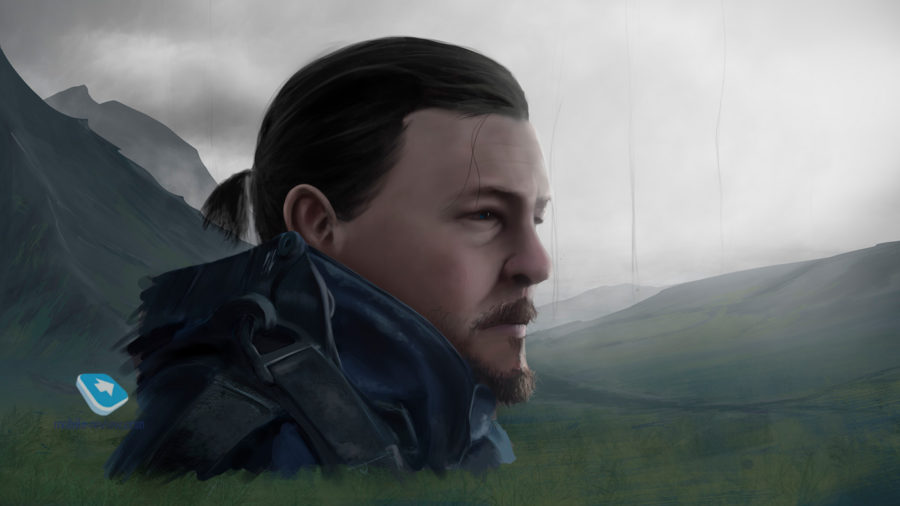
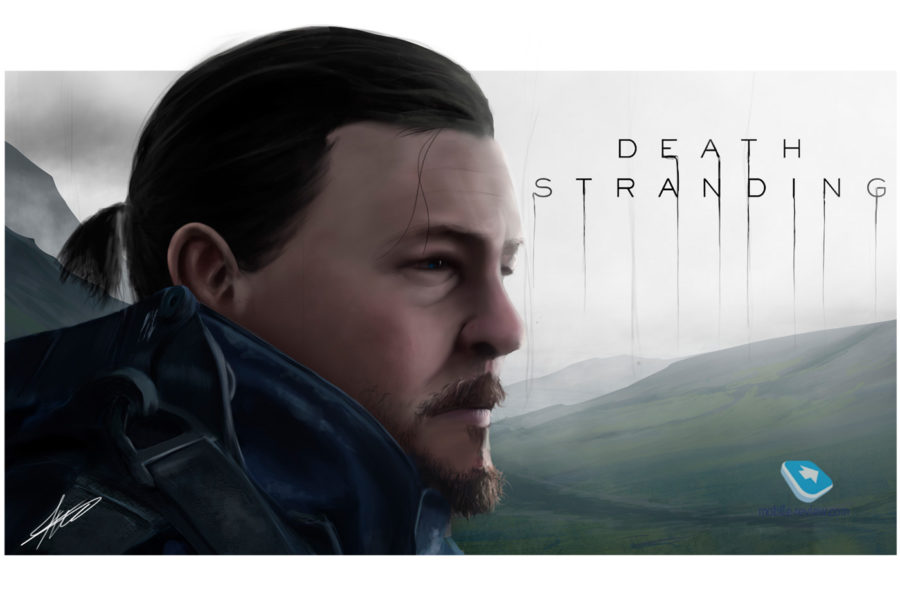
Registration. There is already to your taste and color, as they say. I preferred to make frames with the protagonist's head coming out onto one of them (see the finished drawing for understanding). The main reason for creating such frames was to hide the sloppy areas of the art. After creating the frames, the image was cropped (Selection – Tools – Crop). At the end I added the main inscription “Death Stranding”.
Actually, the project is ready, please love and favor!
Conclusion
The essence of this article was to show the drawing processes of a not very complex plot. A popular theme was chosen as the basis. That is, in fact, he “painted” for fans and admirers of the work of the genius of Hideo Kojima.
When creating this art, I ran into some difficulties, for example, filling the main character with the color of the face. Here it was necessary to convey halftones, highlights and other complex nuances for the artist.
To be fair, Death Stranding fan art is the first project where I had to create a human face from scratch. Other works were carried out with almost no detailed drawing of faces. Therefore, do not judge strictly, tried as best he could?
