Based on materials from phonearena.com
For quite a long time HTC they tried to convince us that it is not so much the number of megapixels in the camera that is important, but the true size of each individual pixel. This concept was taken as a basis for the creation of a 4 megapixel camera with UltraPixel technology. Unfortunately, in reality, the unusual solution from HTC could not be compared with competitors from Samsung, LG, Nokia and Apple.
However, in HTC One M9, the company abandoned its 'ultrapixel' ambitions and installed a main camera in the new 20MP flagship – finally, it should have surprised us with the quality of the frames! But that did not happen. In general, the camera copes with its task, but when compared with the Samsung Galaxy S6 and iPhone 6 it remains behind in terms of the overall quality of the captured images.
However, there are several ways to get the best out of the M9's camera. By fiddling with the settings or using some modes, you can get some really great shots – the ones that you would never get in automatic mode. So let's see what we can do.

- 1. Try changing the aspect ratio to 10: 7
- 2. Swipe between cameras
- 3. Use manual mode for low light conditions
- 4. Use HDR in high contrast footage
- 5. Use Continuous Shooting for Better Shots
- 6. Keep your finger on the screen to lock the exposure and focus setting
- 7. Change frame settings: saturation, sharpness, contrast
- 8. If necessary, manually set the white balance
- 9. Master manual mode
- 10. Use fast Full HD mode for smoother video shooting
- 11. Shoot RAW
1. Try changing the aspect ratio to 10: 7
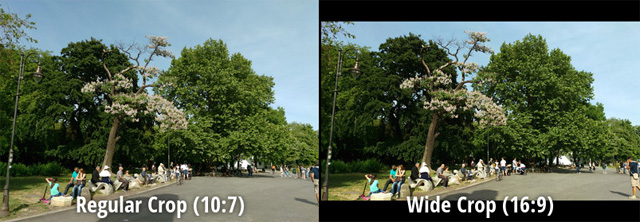
The 20MP camera on the HTC One M9 has an original aspect ratio of 10: 7, but is configured by default to shoot 16: 9 footage, which significantly reduces the vertical angle of view, as seen in the example. To make full use of the camera angle, go into the camera settings and set the aspect ratio to the usual value (10: 7). Note that the front 'ultrapixel' camera has a 'native' ratio of 16: 9, it is better to leave this value here.
2. Swipe between cameras
In HTC One M9, you can switch between the main and front camera with a simple gesture instead of opening the camera switching interface to do so. While in the main camera, swipe right to launch the front camera. Conversely, left to return to main.

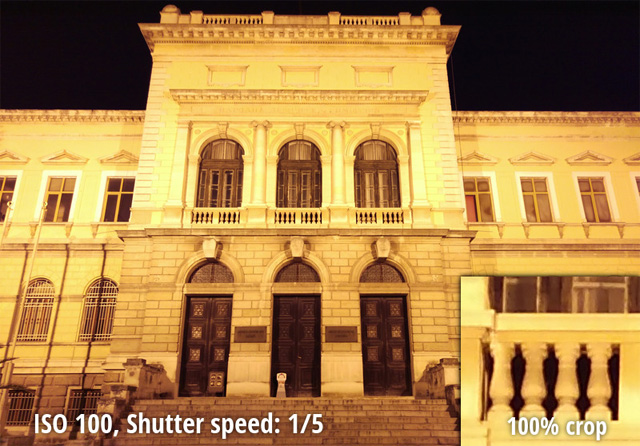
3. Use manual mode for low light conditions
The M9's camera is not as good at shooting in low light as in other devices. You can slightly correct the situation with the help of manual mode. The trick is to lower the sensitivity, such as setting the ISO to 100 to reduce noise and artifacts along with increasing shutter speed. But for this to work, you need a steady hand or something to act as a tripod. Even slight shake will blur the frame.
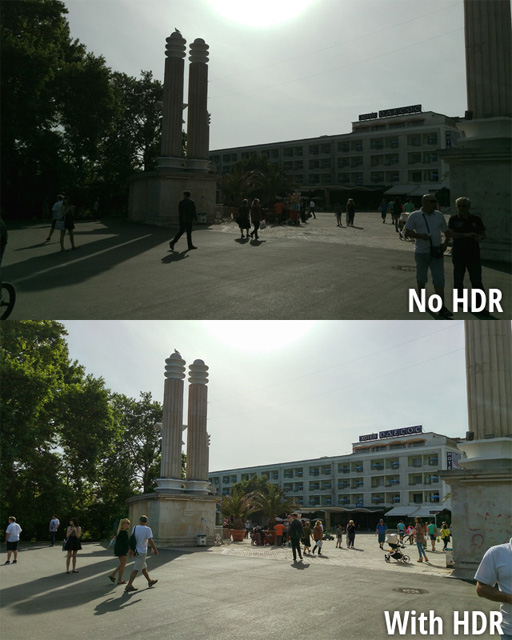
4. Use HDR in high contrast footage
For shots that include both very light and very dark at the same time, try using the built-in HDR mode. As you can see in the example, it can be very helpful. True, you can get small ghosting around moving objects – a common problem with HDR shots.
5. Use Continuous Shooting for Better Shots
When you hold down the shutter button, the camera will start shooting a series of frames until you release your finger. Then you can choose the best frame and delete the rest. This is especially important when shooting time is important to you. By removing the default 20-frame cut-off, you can shoot in continuous mode for a long time, which will allow you to very accurately capture the right moment. And if you set the resolution to low, you can double the shooting speed.

6. Keep your finger on the screen to lock the exposure and focus setting
As you move the camera left and right, exposure and focus automatically adjust to whatever appears in the frame. If you want to set these settings to a specific value, just hold your finger on the screen in the place around which you are building the composition. This way you can lock in your settings, choose a composition, and take a shot at the right moment.

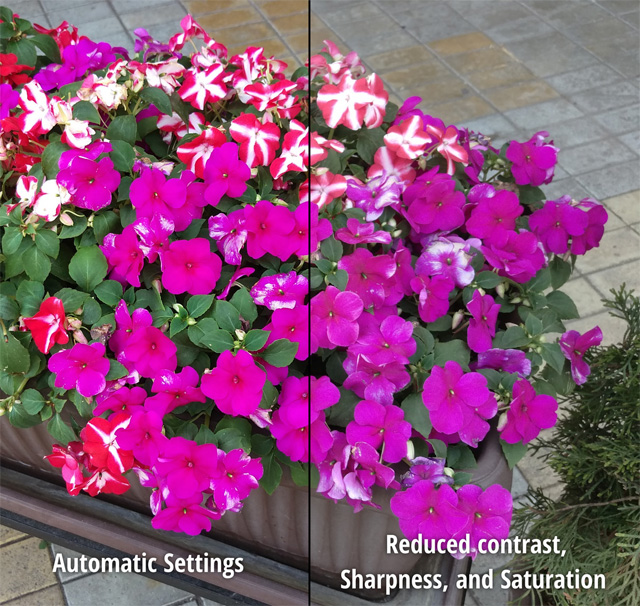
7. Change frame settings: saturation, sharpness, contrast
If you go to the camera menu, you will find the item 'Image settings'. There you can change the saturation, sharpness and contrast. If you're shooting very bright subjects, like these flowers here, you can lower the saturation and contrast. This will make the image more neutral and realistic. And you can play with sharpness if you don't like close-up shots.
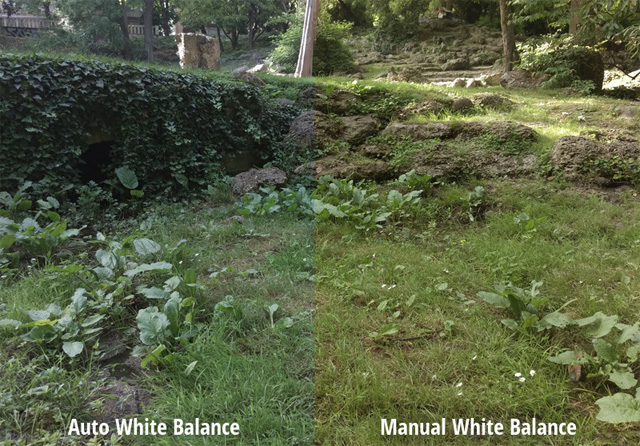
8. If necessary, manually set the white balance
Time after time in HTC they make mistakes with white balance. For example, in this frame with automatic settings, a cooler result is obtained. Setting the balance to 'Day' helped to get a more realistic shot here.
9. Master manual mode
Feel free to experiment with manual settings. Shutter speed, ISO, focus, and white balance are all independently adjustable, and knowing how each setting works can help you not only capture better everyday shots, but also create truly artistic shots.
Adjusting the white balance will make your shots 'warmer' or 'colder' depending on the lighting conditions. Change the settings while looking through the lens until the colors are close to reality.
The ISO value indicates how sensitive the camera is to light. Increasing this value makes the camera more sensitive, but also increases digital noise. And low ISO requires a slow shutter speed and can be difficult to use in low light.
Shutter speed, in turn, means how long the camera shutter remains open. This is that brief moment when the picture is taken, and in the M9 it ranges from 1/8000 of a second to 2 seconds.
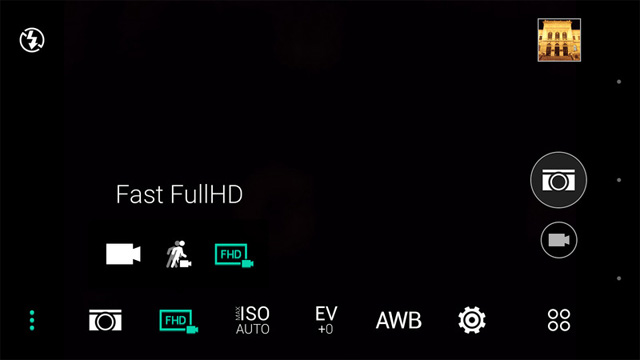
10. Use fast Full HD mode for smoother video shooting
The fast Full HD mode on the M9 allows for smoother video because it uses a higher frame rate. While usually video is recorded at 30 frames per second, here this value increases to 60. However, we do not recommend using this mode in poor lighting conditions.
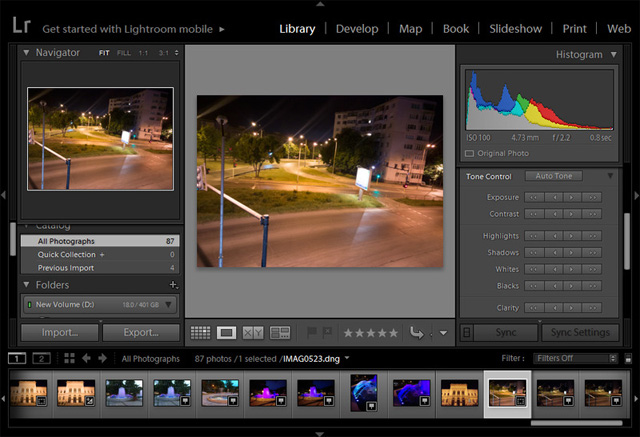
11. Shoot RAW
With a recent update, the M9 is now able to shoot in RAW. This is ideal for post-processing images in advanced editors such as Adobe Lightroom, as it stores all the information about the frame received by the camera sensor, without compression or noise reduction. The result is a frame that looks better than an identical JPEG if you know what to do with it. However, there are costs: RAW shots consume about 40 MB of space each and cannot be shot in quick succession.